
April 7, 2025
Sandy:
We’re shambling our way toward Black Velvet Wall—slowly but surely, like a couple of overcaffeinated desert tortoises. After stretching our legs (and egos) on Whiskey Peak, this marks climb #2 in the mystical land of Black Velvet Canyon.
If your perfect day involves steep splitter cracks, hand jams that feel like a warm handshake from the rock gods, and a #4 crack that actually rewards you with edges for feet (a rare treat, we know), then Triassic Sands is calling your name. It’s crack climbing—but with just enough style and spice to keep you smiling throughout the way with the comfort of bolted belays for all three pitches (if you split P1 and P2, you will need gear anchor at the base of P2).
Pretty much every climber we know who isn’t a sandbagger lights up when you mention Triassic. “Oh! that is such a great route, total classic,” they say—usually with a dreamy look and chalk still smeared on their face. And honestly, they’re not wrong. The only real puckering moment is the second roof on pitch 2, but it’s well-protected, and the falls are about as kind as sandstone and gravity allow.
Full beta, gear list, and all the juicy details are tucked in the image caption. Now quit scrolling and go wrestle some sandstone, Tiger. If you want GPX tacks of the approach then please leave a comment and I will email it to you at the email address visible to me.
Gear: Double rack with a #4 and 70m rope with a tag line. We rapped off after pitch 4.

Pitch 1, 5.7, 50 feet: We linked P1 and P2 into a mega 170-foot funland. After the roof pulls, P2 turns into a steep hand crack highway—so naturally, Rick went full zen mode and basically soloed P1, tossing in a single #3 just before the slabby traverse to the base of P2. Bold? Maybe. Efficient? Absolutely.
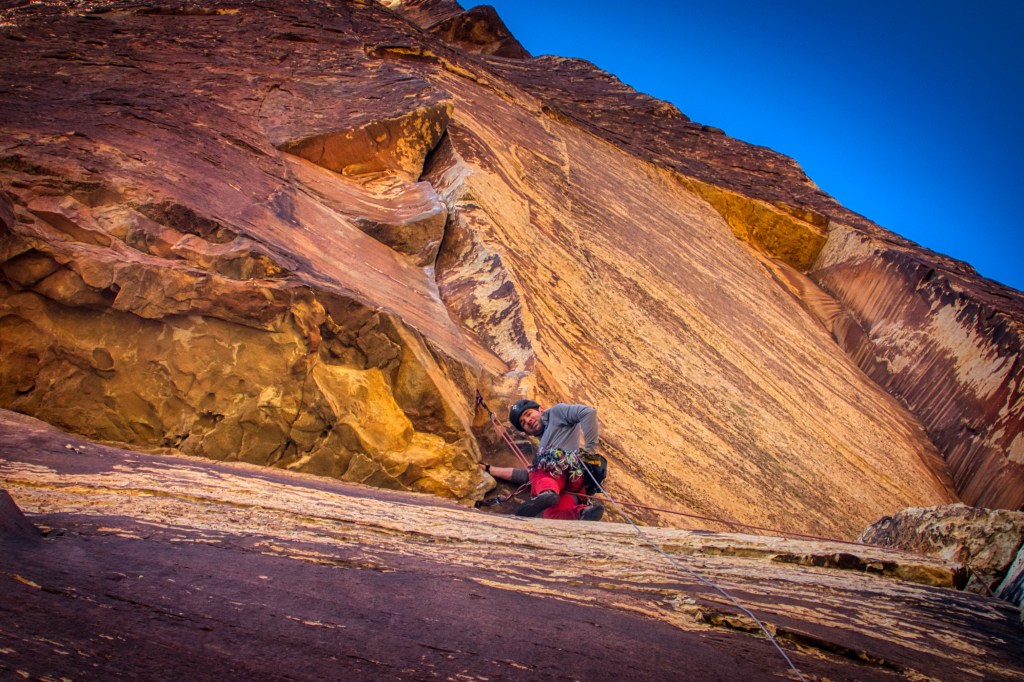
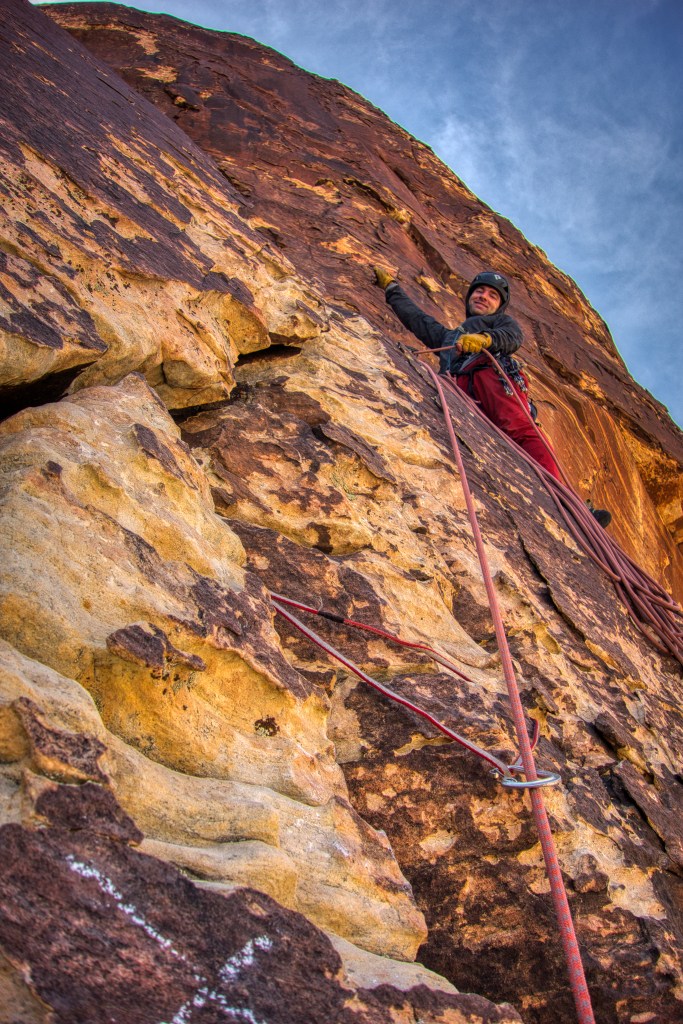
Pitch 2, 5.10b, 120 feet: Place a .5 and pose for a great shot. I consider this as a triple bulge/roof system where the first one right above Rick has awesome feet for stemming and great finger locks.

Pitch 2, 5.10b, 120 feet: In the above fantastic frame, the second piece is a trusty .3, followed by a .4 just below the second bulge/roof. A #2 slots in nicely under the third bulge for solid pro. Now, here’s where things got interesting: the second bulge threw me off a bit. There’s this inviting edge out left of the crack that begs for a mantle to bypass the finger crack layback. Tempting, yes—but once you mantle, there’s a cruel surprise: zero hands and the crack’s just out of reach (for reference, I’m 5’7″ with a decent wingspan and still came up short). The cleaner (and safer) solution? Commit to the finger crack layback with some creative smear-stemming, and it’ll lead you right into the sweet hand crack below the third bulge. It’s a bit technical, but way more secure.


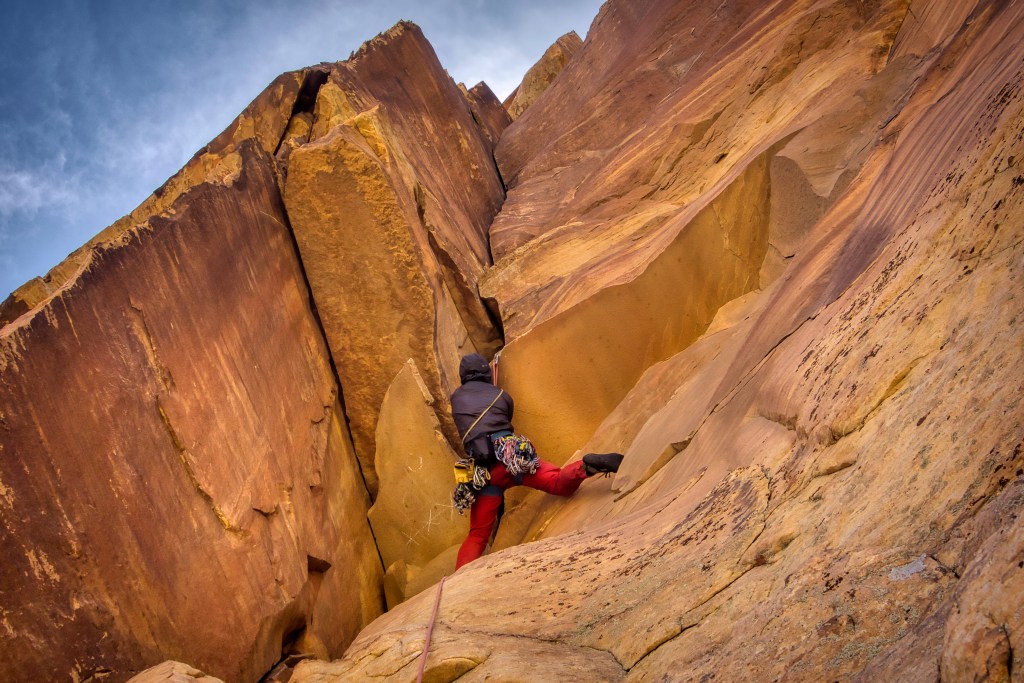
Pitch 2, 5.10b, 120 feet: Left: Behold the glorious steep splitter we were all promised—beautiful, burly, and unfortunately, hungry. It devoured our #3 (you can see it in the pic), and despite my noble tugging efforts, it wasn’t budging. Rick even rapped down to give it a go, but the #3 seemed to have shifted into full overcammed stubbornness. The crack is a bit offset and wavy as you can see, so heads up when placing gear—what looks bomber might decide to stay forever. Right: The finish to pitch 2—pull on flake, use edges for feet or heel toe into the wide crack, enjoy the aesthetic, and a great reward for surviving the gear-eating crack below.
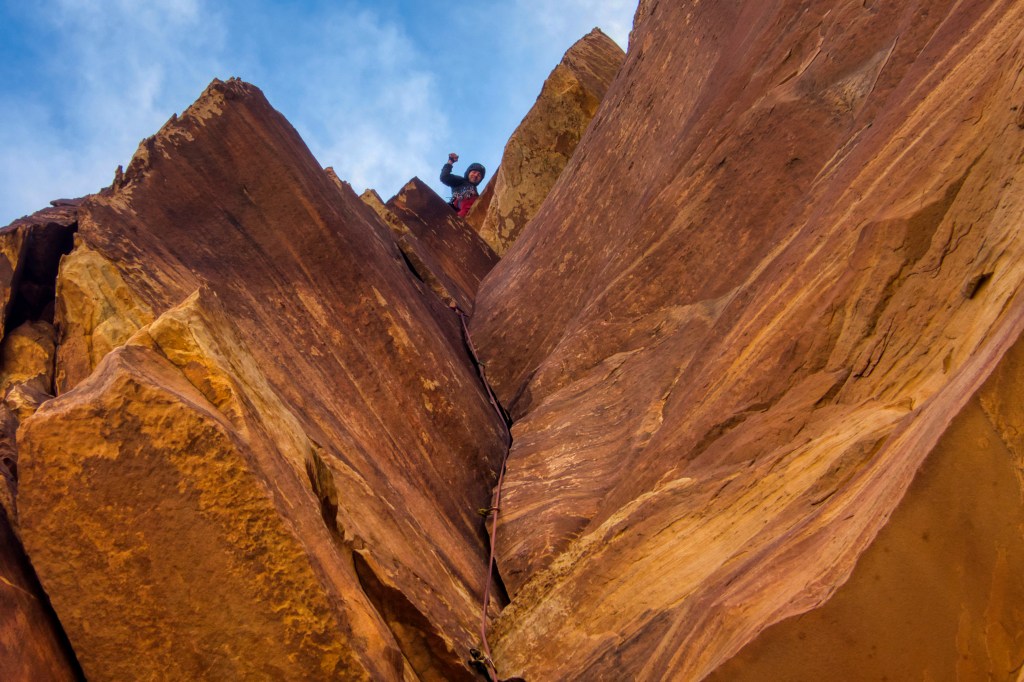
Pitch 3 – 5.8, 160 feet: This line just looked too good to pass up for the lead—an inviting stretch of wide crack (.75 is tight hand jam for me and I wasn’t even getting fist jams here) that dares you to commit. As far as you can see in the photo, it’s a sustained shuffle between #4 and some wishful-thinking #3 placements. I had only one #4, so instead of playing the “bump and pray” game on a single piece the whole way, I threw in the occasional marginal #3 for a bit of mental comfort while inching the big guy upward. Lots of edges for hands and feet if jamming does not float your boat. Eventually, I had to part ways with it near the end of the crack—farewell, old friend. You’ll notice the main crack peters out above, with a new hand crack system heading off to the left. Further left, there’s also a sharp-looking finger crack that might go around 5.9+/5.10a, though the guidebook is suspiciously silent on that one. A little mystery never hurt anyone, right?


Pitch 3 – 5.8, 160 feet: Left – This is the main hand crack system of pitch 3—clean, classic, and super satisfying. The spicier finger crack variation lies further left if you’re feeling bold. Stick with the hand crack and you’ll finish by mantling up onto a ledge out right. Right – Just when you think the pitch is done, the route serves up a final treat—a finger crack at the friendly 5.8 grade, finishing in a short chimney tucked below the belay ledge. That last move into the chimney was a bit heady, especially protected by a #3 that looks solid in the picture below but felt like a prayer in metal form. But hey, it’s a 5.8 chimney… no one actually falls out of those, right? Right?

Pitch 3 – 5.8, 160 feet: P3 finish with a fun chimney. I think a #4 will protect well below the #3. But for a solid leader, two #4s is too much weight for just four pitches. Once you pull the chimney, there’s a bolted belay station on a wide comfy ledge.
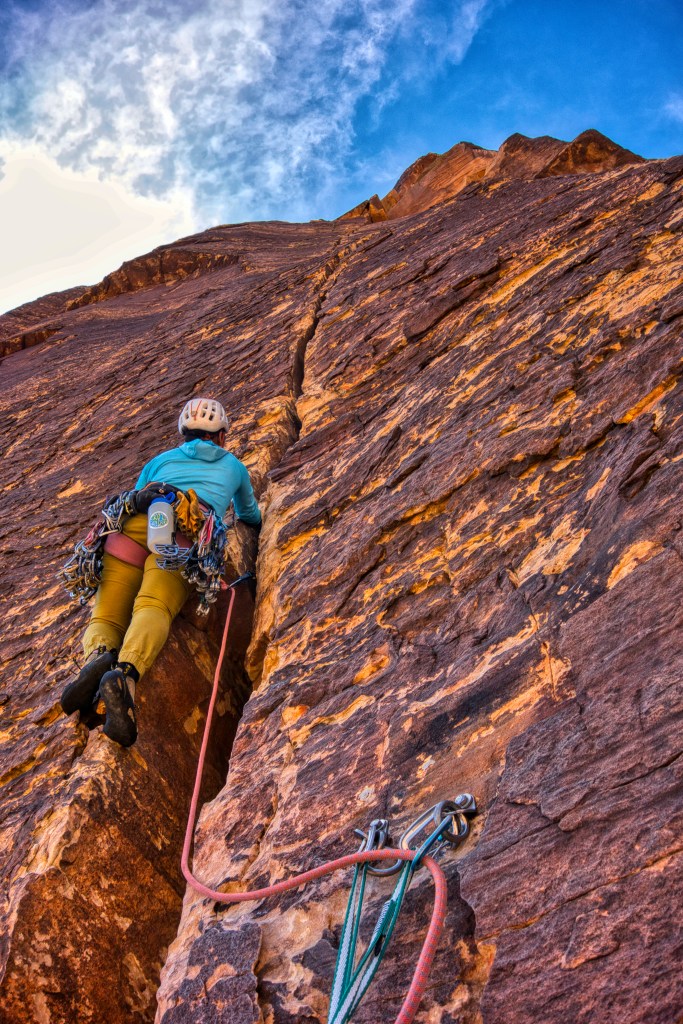
Pitch 4 – 5.10a, 100 feet: When we racked up at the base, a party rolled in two minutes behind us and called out, “Don’t skip pitch 4—it’s an amazing splitter!” Naturally, I asked Rick, “Wait, why would anyone skip it?” His answer? “Because that tic-tac-toe flake under the roof is supposedly loose.” Well, we both stepped our left foot on it—and nothing. Didn’t creak, didn’t shift, didn’t even flinch. So trust us: don’t skip this pitch. It turned out to be my favorite of the entire climb. It’s like a little slice of Indian Creek dropped into Red Rocks—pure joy. The start, as you can see in the photo (and the one below), is a beautiful hand crack that eats #2s, .75s, and #1s. Whether you face the crack and go classic jams with stem-smear footwork, or jam-back your way up cowboy style, it all goes. And it all feels good.

Pitch 4 – 5.10a, 100 feet: A lot easier bulge compared to the second bulge/roof on P2.
Pitch 4 – 5.10a, 100 feet: This pitch is sneakily long—definitely longer than it first appears. After cruising the initial hand crack, you’ll transition into a layback finger crack system (visible in the left photo below), which adds just enough spice to keep things interesting. From there, it eases up into some friendly crack-protected face climbing that leads you right to the bolted belay, as shown in the right photo. A full-value pitch from bottom to top.

Pitch 4 – 5.10a, 100 feet: P4 finish.
One of the things I absolutely loved about this route is the sheer variety packed into every pitch. You get it all: wide cracks, finger crack roofs/bulges, perfect hand jams, edges for both hands and feet, mellow finger cracks with tons of foot options, a fun little chimney, splitter corner systems—and to top it off, unbeatable views the whole way.
So… are you excited, or excited? Because this climb doesn’t really give you another option.
